Opening settings and who can change them
Click the gear icon, “Workspace settings”, at the top right of the workspace home to open “General”. If you opened settings from “Settings” in your own menu, pick a page from the Workspace group in the list on the left.
Only Owners and Admins can open workspace settings. People with the Member role see no workspace pages in the list, only the note “Only owners and admins can change workspace settings.”
| Page | Owner | Admin |
|---|---|---|
| General, Members, Theme, Integrations, Audit log | View and change | View and change |
| AI integration | View and change | Can revoke connections, but cannot change whether AI may make members Admins |
| Billing | View and change | View only |
For what each role can do, see Roles and visibility.
General
- “Name” is shown in the header and the workspace switcher. Changes save right away
- “URL” is the workspace address. It cannot be changed after creation, because bookmarks and links you have shared would stop working
View links
Turn on “Allow view links” to let project Managers create a view-only link for each shared board that works without signing in. “Active links” lists each link with its board, who created it and how long it is valid. Click “Turn off” to stop a single link.
Turning the setting off blocks new links and turns off every existing link. Turning it back on does not restore them. AI cannot change this setting; it can be changed only on the web, and each change is recorded in the audit log.
To create view links, see Shared page and view links.
Members
Add internal members to the workspace, change their roles and remove them. The heading shows the current number of internal members and your plan’s limit.
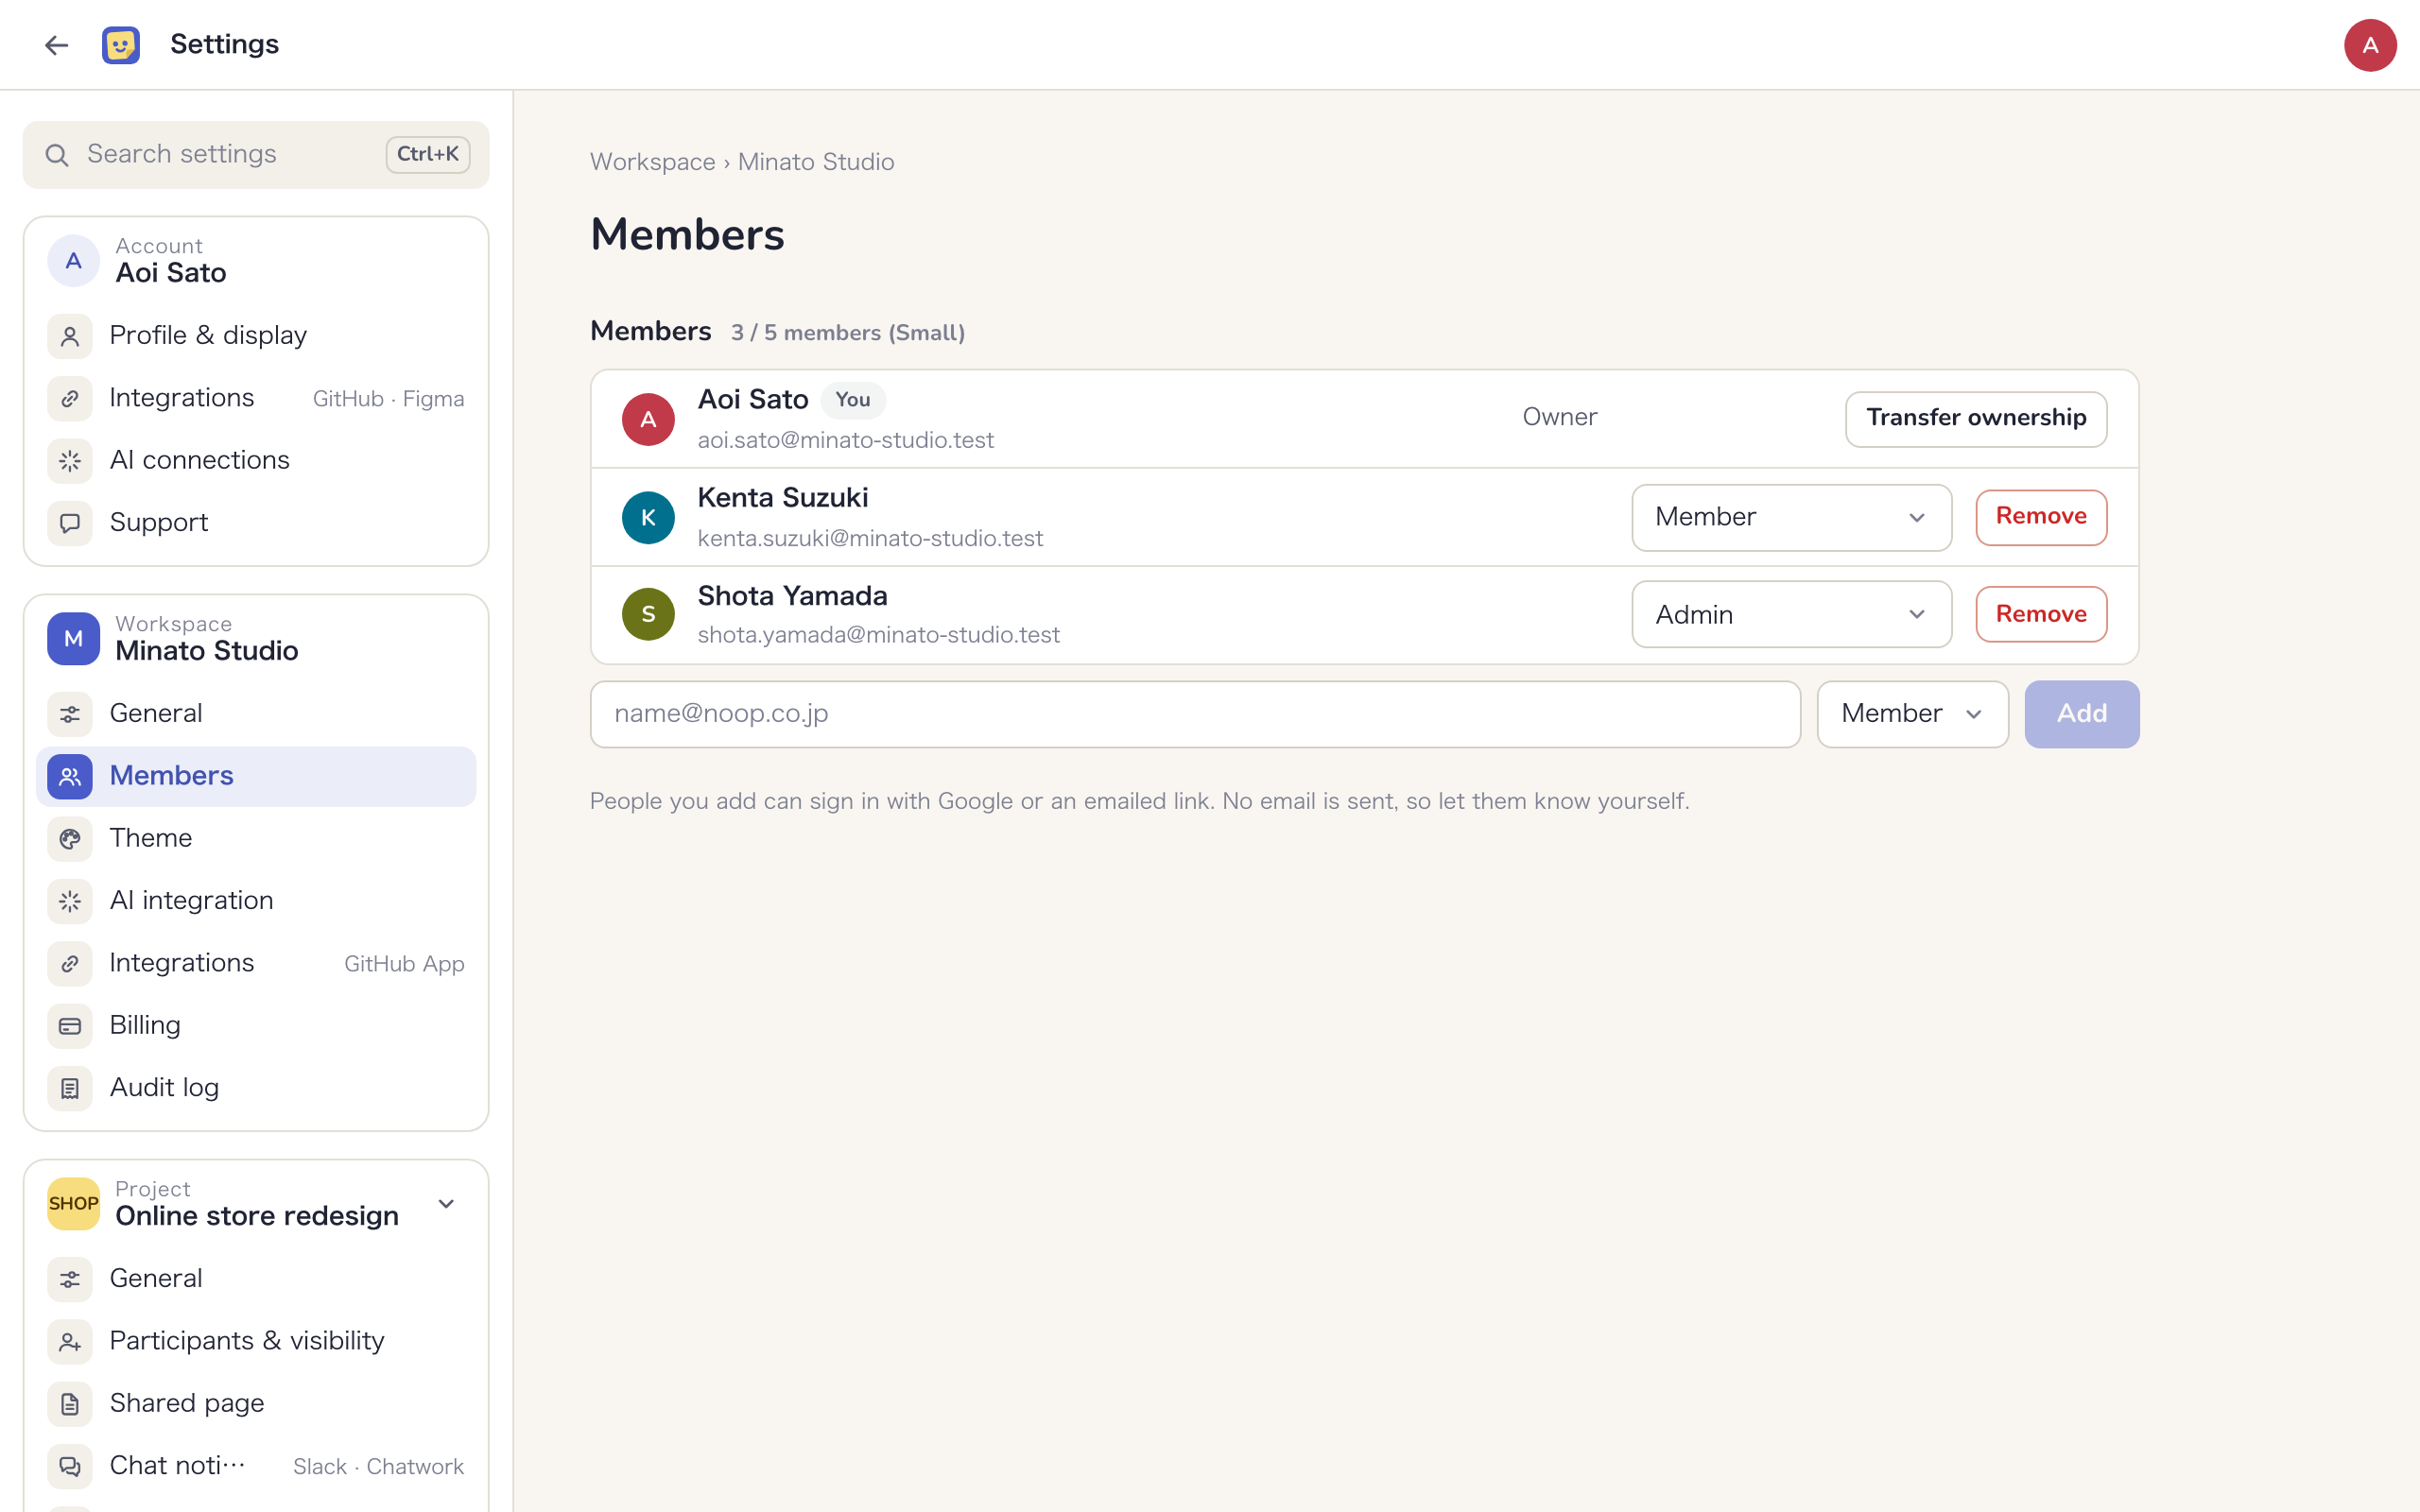
Add an internal member
- Enter the person’s email address in the field at the bottom
- Choose “Admin” or “Member” as the role
- Click “Add”
People you add can sign in with Google or an emailed sign-in link. Mockedule does not email them when you add them, so let them know yourself.
If you have reached your plan’s internal member limit, the person is not added and a message explains the limit. Owners also see “Open billing”.
Change roles and remove internal members
Use the role selector on a row to switch between “Admin” and “Member”. Click “Remove” and confirm to take someone out of the workspace. They are disconnected from open boards and signed out. The Owner’s row and your own row cannot be changed or removed.
Transfer ownership
The Owner can transfer ownership to another internal member with “Transfer ownership” on their own row.
- Click “Transfer ownership” and choose the “New owner”
- If it has been a while since you signed in, click “Sign in again” to confirm it is you
- Click “Transfer to (name)”
After the transfer you become an Admin. Only the new Owner can change plans, cancel or update the card, and Stripe invoices and notices go to the new Owner’s email address. To get ownership back, the new Owner has to transfer it to you. A Free workspace cannot be transferred to someone who already owns a Free workspace.
Theme
Choose the accent color of the workspace. The shared page uses the same colors.
- There are four presets under “Preset”: “Indigo”, “Teal”, “Plum” and “Ink”. Your choice saves right away
- Use “Custom color” to match a client’s brand color. Pick a color or type one like
#4f46d9to preview it on screen, then click “Use this color” to save it. “Back to the preset color” undoes it
Only the accent color (primary buttons, selection, highlights of changes from AI) and the tint of neutral colors change. Status, overdue, external and sticky note colors stay the same.
AI integration
Decide what AI apps such as Claude may do in this workspace via MCP. Your own connections are under “AI connections” in Account settings.
- When “Let AI make members admins” is on, AI can make people Admins when it adds internal members or changes roles for you. While it is off, AI can only assign the Member role. Only the Owner can change this setting, and only on the web. Each change is recorded in the audit log
- “Connected AI apps” lists the connections that can read and write this workspace, showing whose connection each one is and which app it uses. Owners and Admins can click “Revoke” to remove one
Integrations
Install the GitHub App to collect pushes, PRs and issues from GitHub as activity. The app only reads and never writes to GitHub.
- Click “Install the GitHub App”
- On GitHub, choose an organization or personal account and the repositories to share
- Back in Mockedule, “Installed on” lists the account and the number of repositories shared
Click “Change on GitHub” to change which repositories are shared. “Delivery status” shows the last event received and the number of failed deliveries. Project Managers link repositories to each project under “Integrations” in Project settings. Events from repositories that are not linked do not become activity.
Billing
See your current plan and your usage of internal members, active projects and image storage, and choose a plan. Admins can only view this page; only the Owner can change plans, cancel or update the card. The steps are explained in Plans and billing.
Audit log
The audit log records members and roles, participants and invitations, board visibility, archiving and deletion, and writes from AI. Owners and Admins can read it.
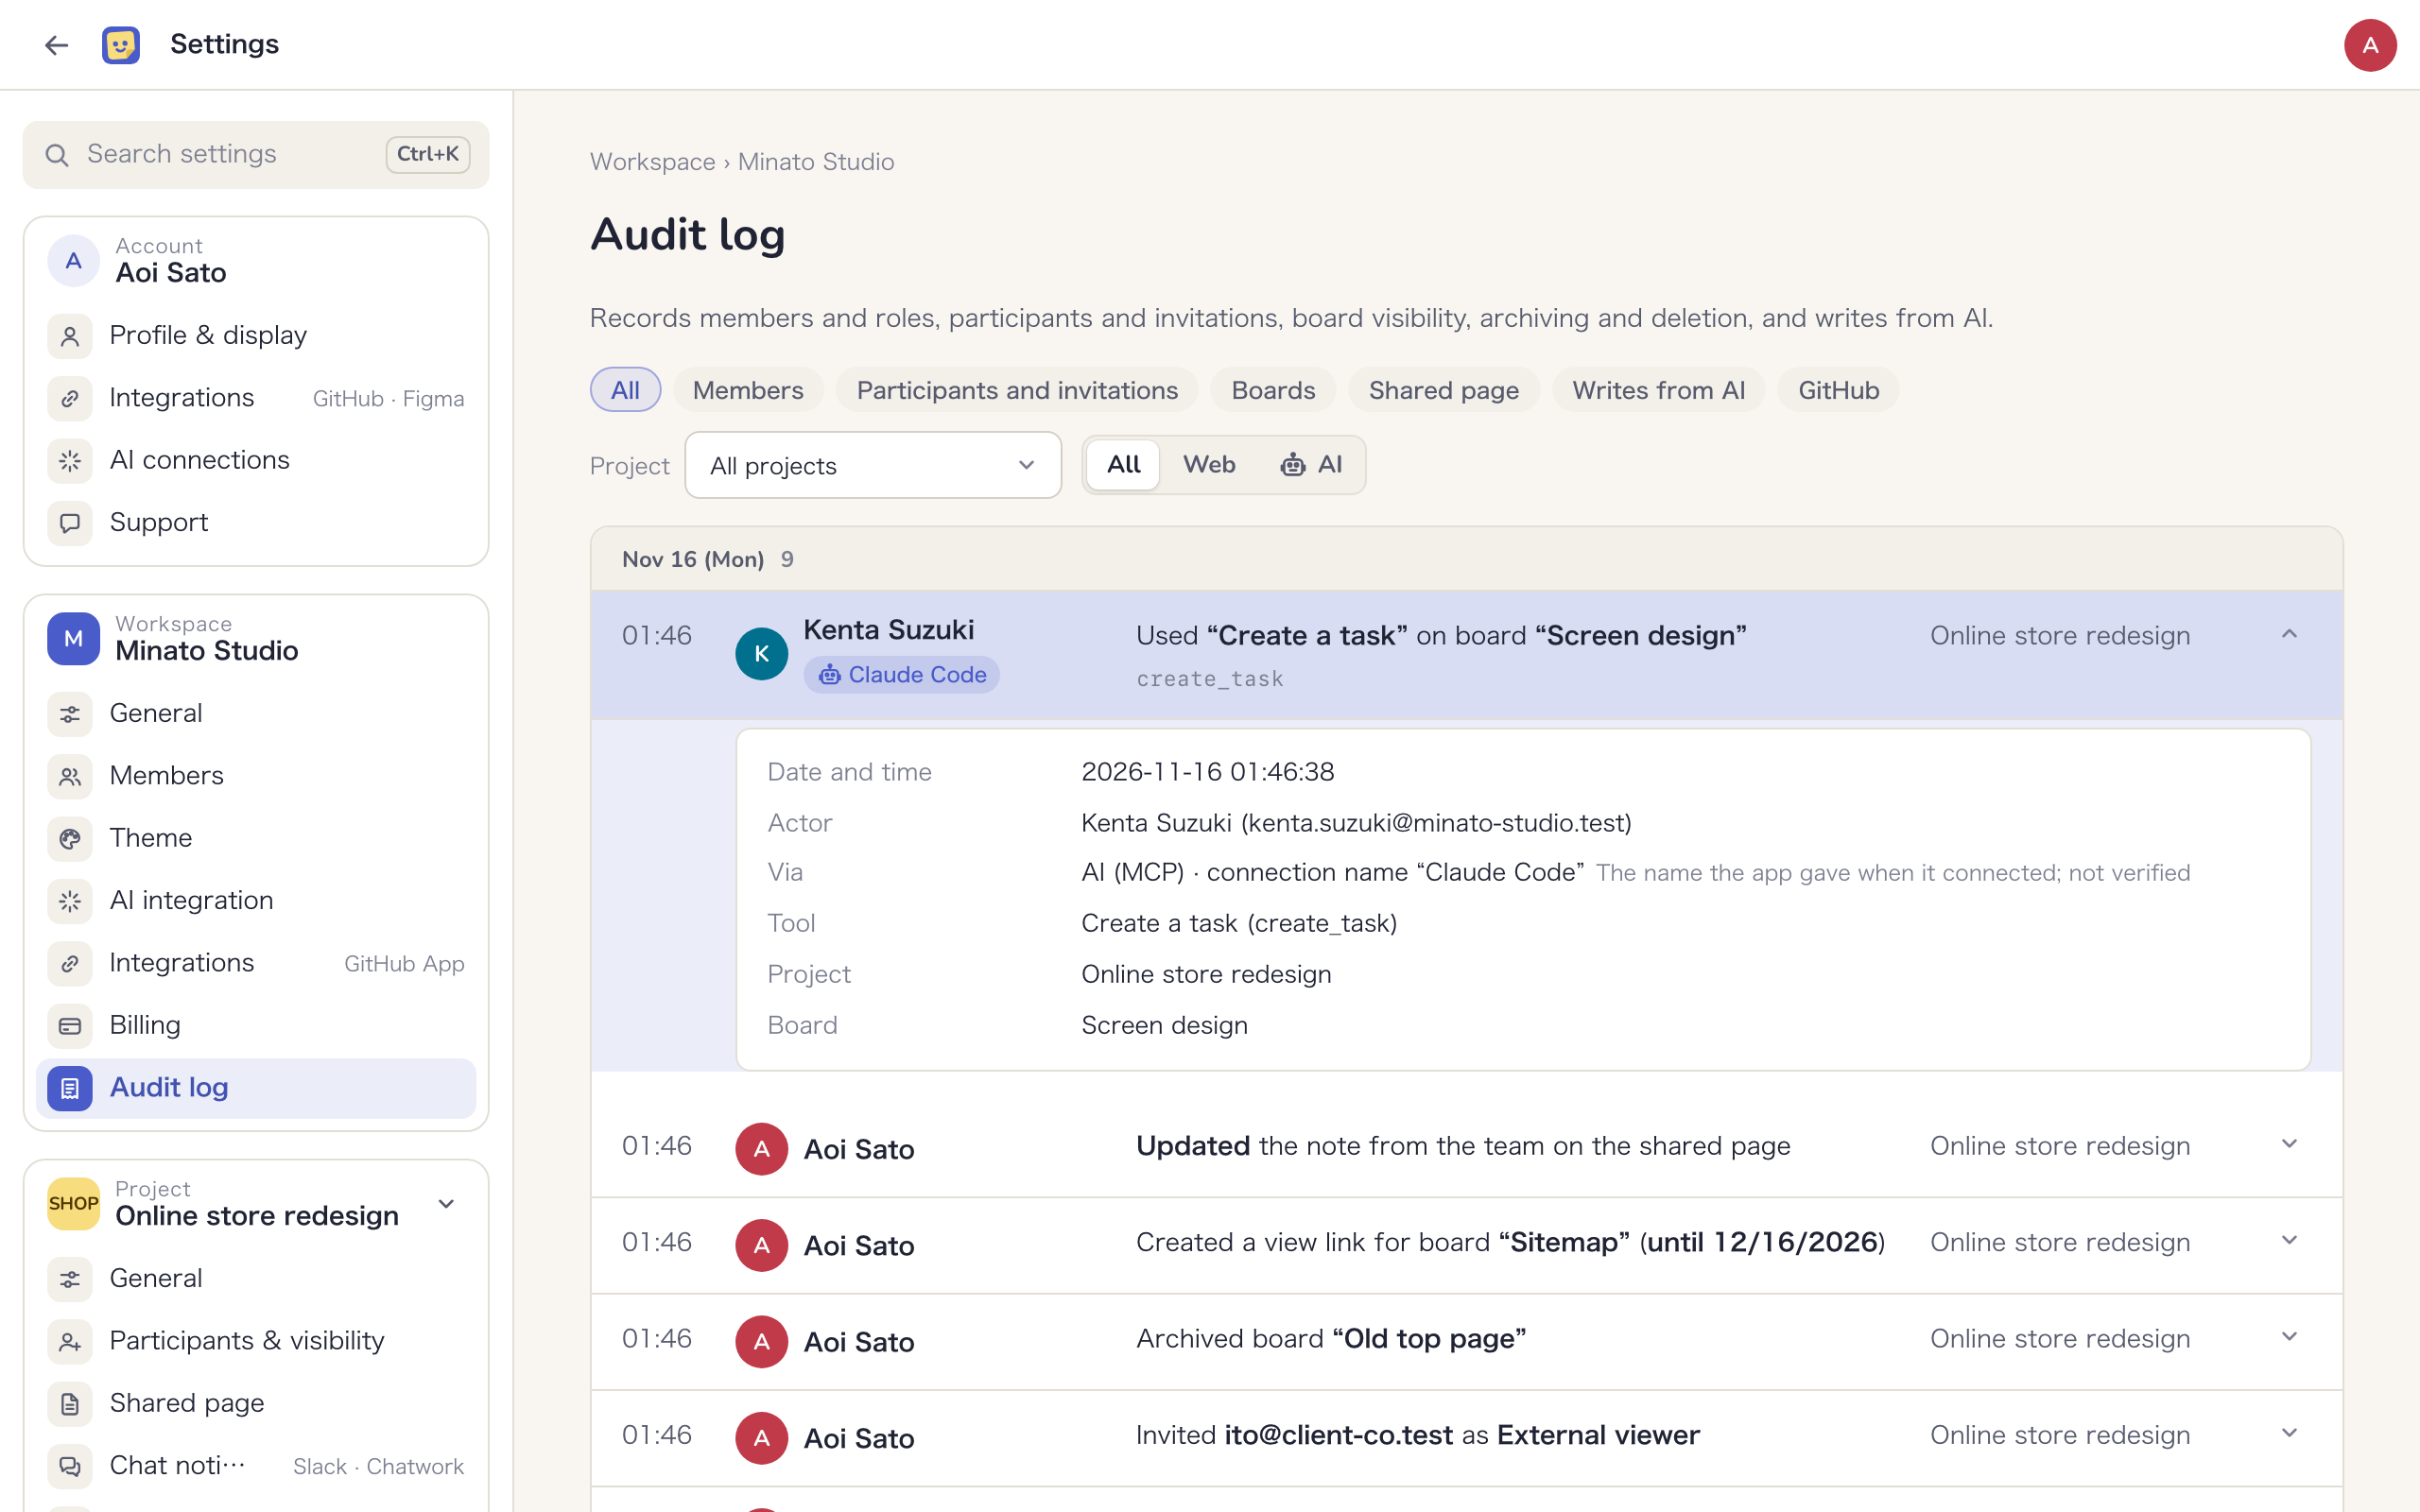
- Entries appear newest first, grouped by day. Click “Load more” at the bottom for older ones
- Filter by “Kind of action” (“Members”, “Participants and invitations”, “Boards”, “Shared page”, “Writes from AI”, “GitHub”), by “Via” (“Web”, “AI”) and by “Project”. “Clear filters” shows everything again
- Click a row to see what was recorded
- Actions taken by the Mockedule team show “Mockedule staff” as the person who acted