Opening settings and who can see them
Click the gear icon, “Project settings”, on the right of the board or timeline header to open “General”. Use the Project group in the list on the left to move to other pages.
| Page | Manager | Member | External participants and Clients |
|---|---|---|---|
| General | Change | View only | View only |
| Participants & visibility | Change | Can change board visibility only | View participants only |
| Shared page, Chat notifications, Integrations | Change | View only | Not shown |
| Labels | Change | Change | Not shown |
For what each role can do, see Roles and visibility.
General
- “Name” is shown in the header and the project list. Changes save right away
- “Task key” is the prefix of task numbers. It cannot be changed after creation, because keys appear in GitHub branch names and links
- “Shared page title” is shown at the top of the shared page for clients. If it is empty, the project name is shown
Participants & visibility
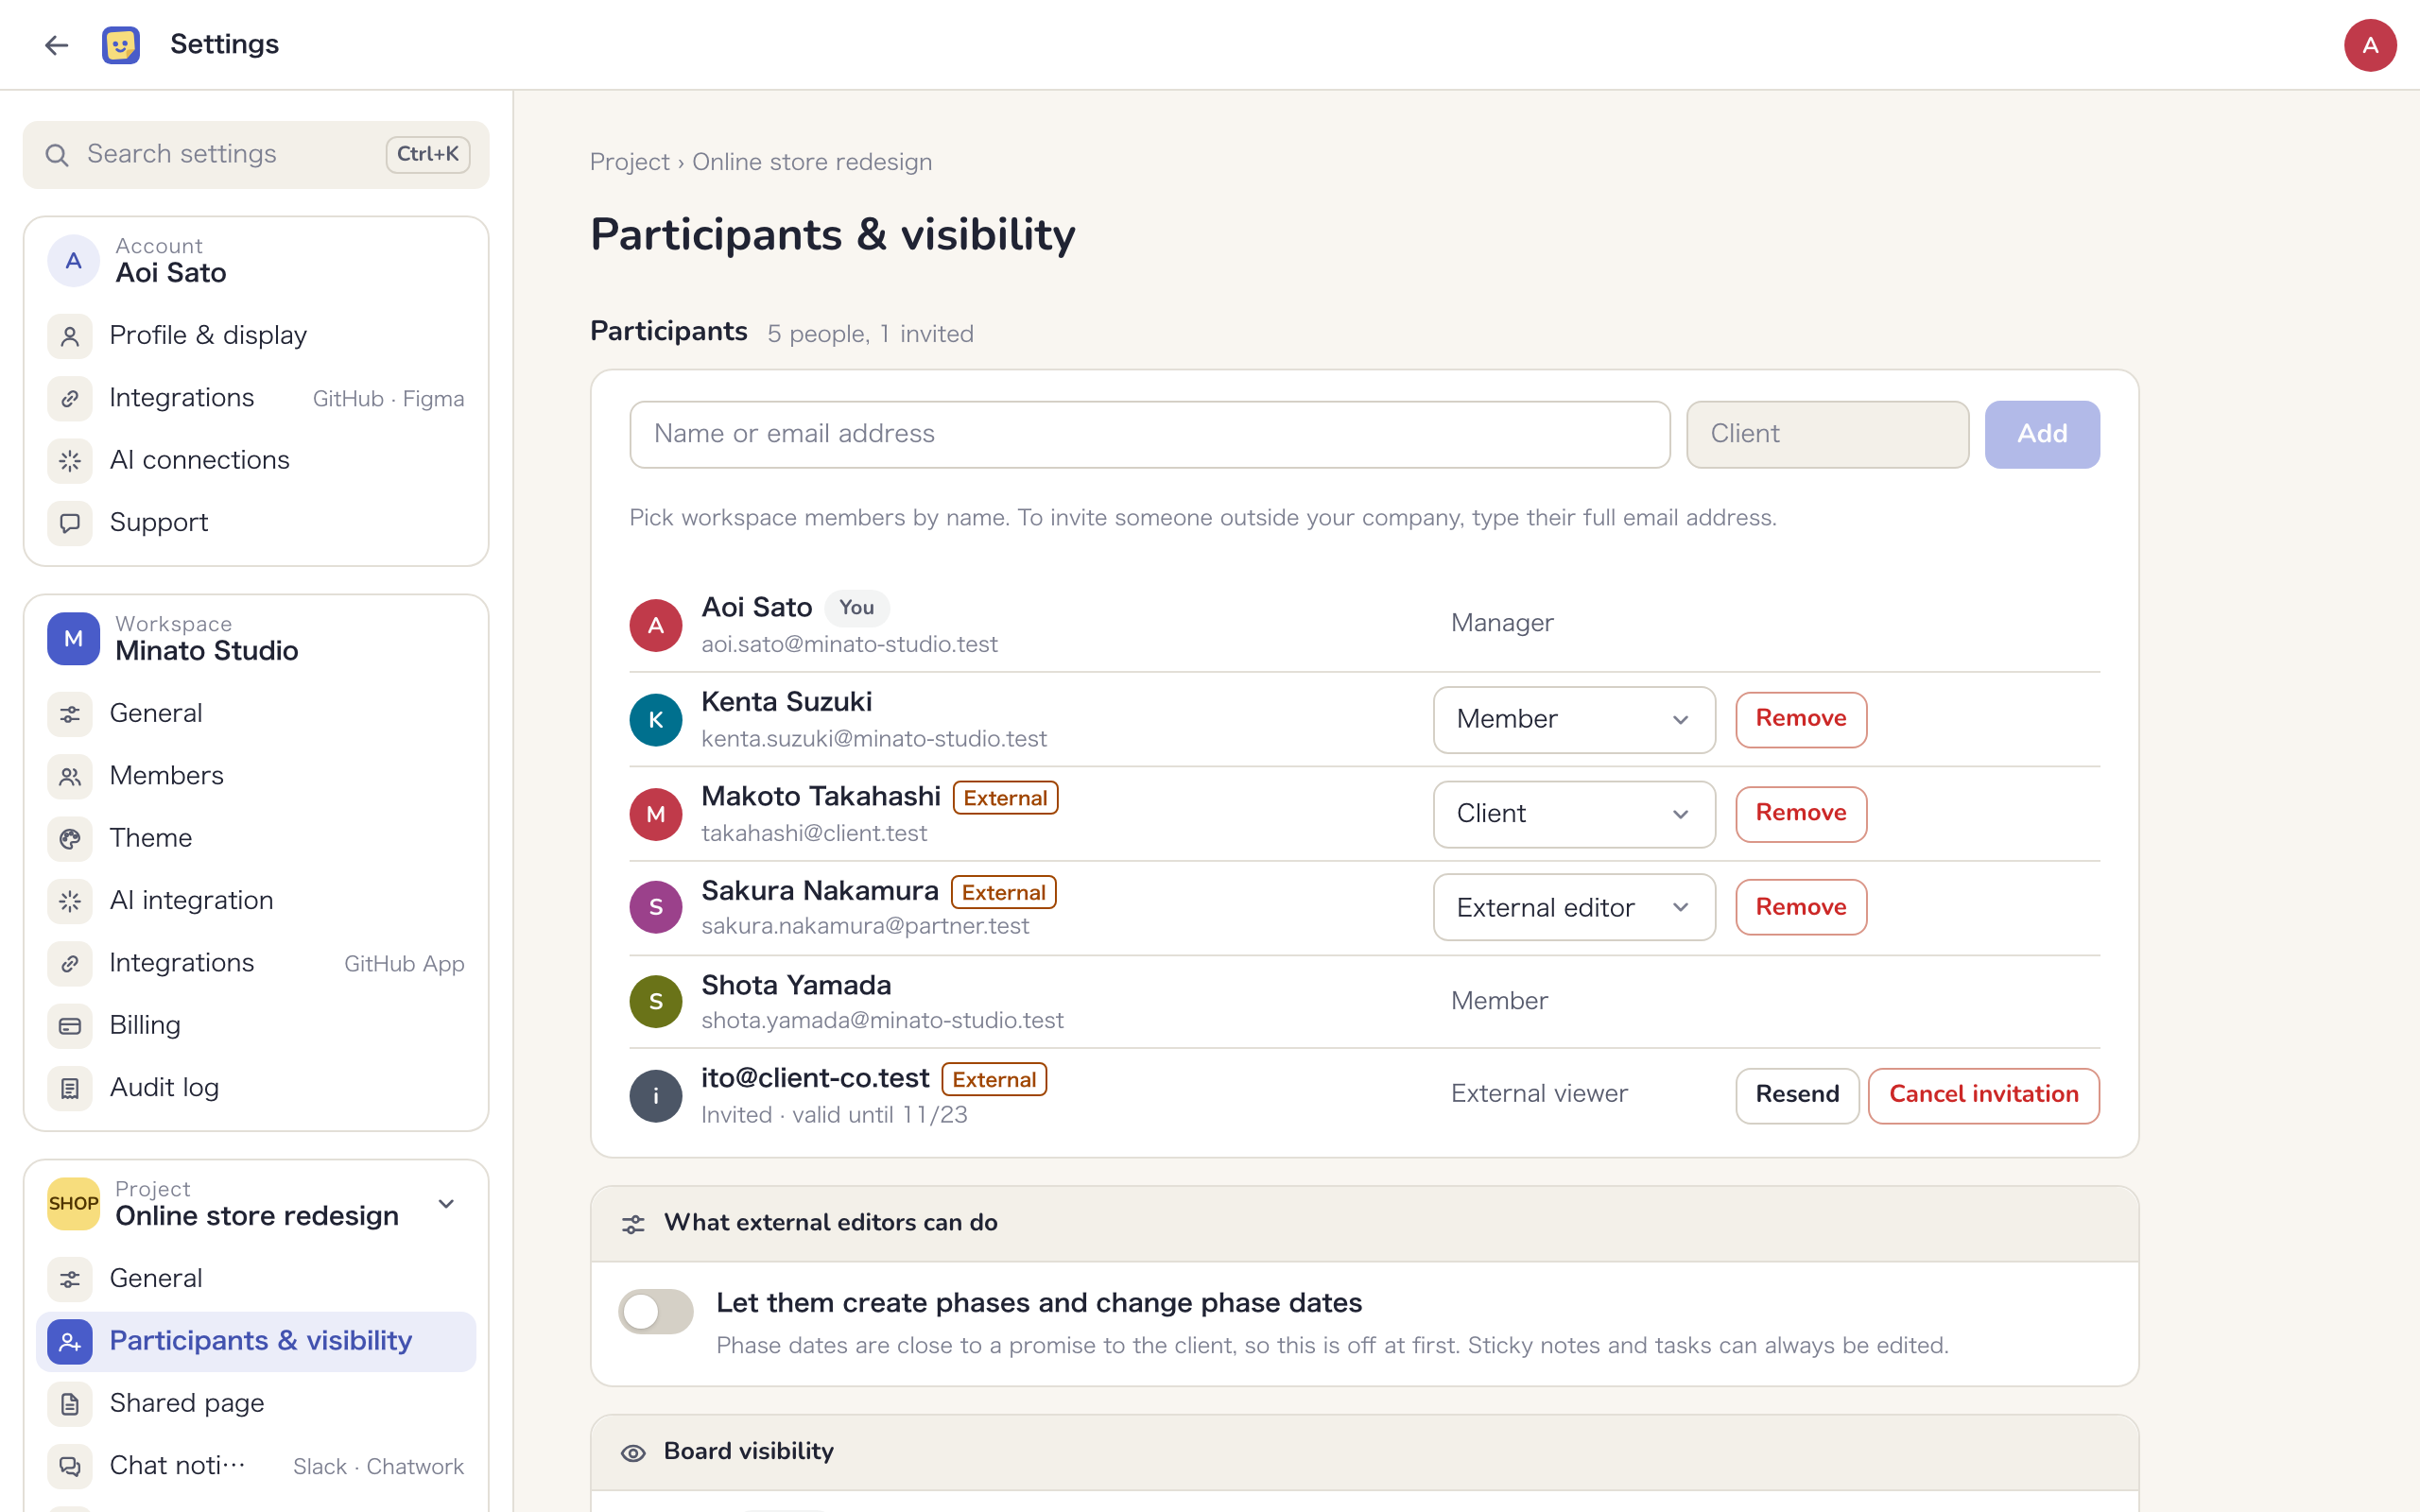
Decide who takes part in the project and who can see each board. You can also invite people and change visibility from “Share” in the board header.
Add and invite people
- Type the person’s name or email address in the field at the top. Pick internal members by name from the suggestions. For someone outside your company, type their full email address
- Choose a role: “Manager” or “Member” for internal members, or “External editor”, “External viewer” or “Client” for people outside your company
- For an internal member, click “Add”; they join right away without an invitation email. For someone outside, click “Send invitation”; they get an invitation email with a link that is valid for 7 days
Pending invitations are listed as “Invited” with their expiry date. Click “Resend” to send the email again, or “Cancel invitation” to withdraw it. On the Free plan, external participants can only view and comment, so inviting someone as an “External editor” requires upgrading the plan.
Change roles and remove people
Use the role selector on a participant’s row to change their role. Click “Remove” and confirm. The person is removed from the project and disconnected from open boards and the timeline right away. They remain the assignee of their tasks, and their comments stay. Only Managers can add people or change roles.
What external editors can do
Turn on “Let them create phases and change phase dates” to let External editors create phases and change phase dates. Phase dates are close to a promise to the client, so this is off at first. Sticky notes and tasks can always be edited. Only Managers can change this.
Board visibility
For each board, choose “Everyone in the project” or “Internal only”. Internal-only boards are visible to Managers and Members only. The default board that every project starts with cannot be made internal only. External participants do not see this section.
Shared page
Set the week used for “This week” on the shared page and the writing style the AI reads when it summarizes progress. Changes save right away. Only Managers can change them.
- “Week starts on” sets the period for “This week”. Choose a day, such as “Monday at 0:00”, and a “Time zone”
- Under “Writing style for AI summaries”, write “Style instructions” of up to 1,000 characters for your AI to read when it summarizes progress. For example: “Write in a polite tone. For delays, state the impact on the overall schedule before the reason.”
- “Glossary” lists words clients may not understand and what to say instead. Click “Add a term” to add a row, then fill in “Instead of” and “Say instead”. You can add up to 100 terms, and they are passed to the AI along with the sources for progress summaries
For the shared page itself, see Shared page and view links.
Chat notifications
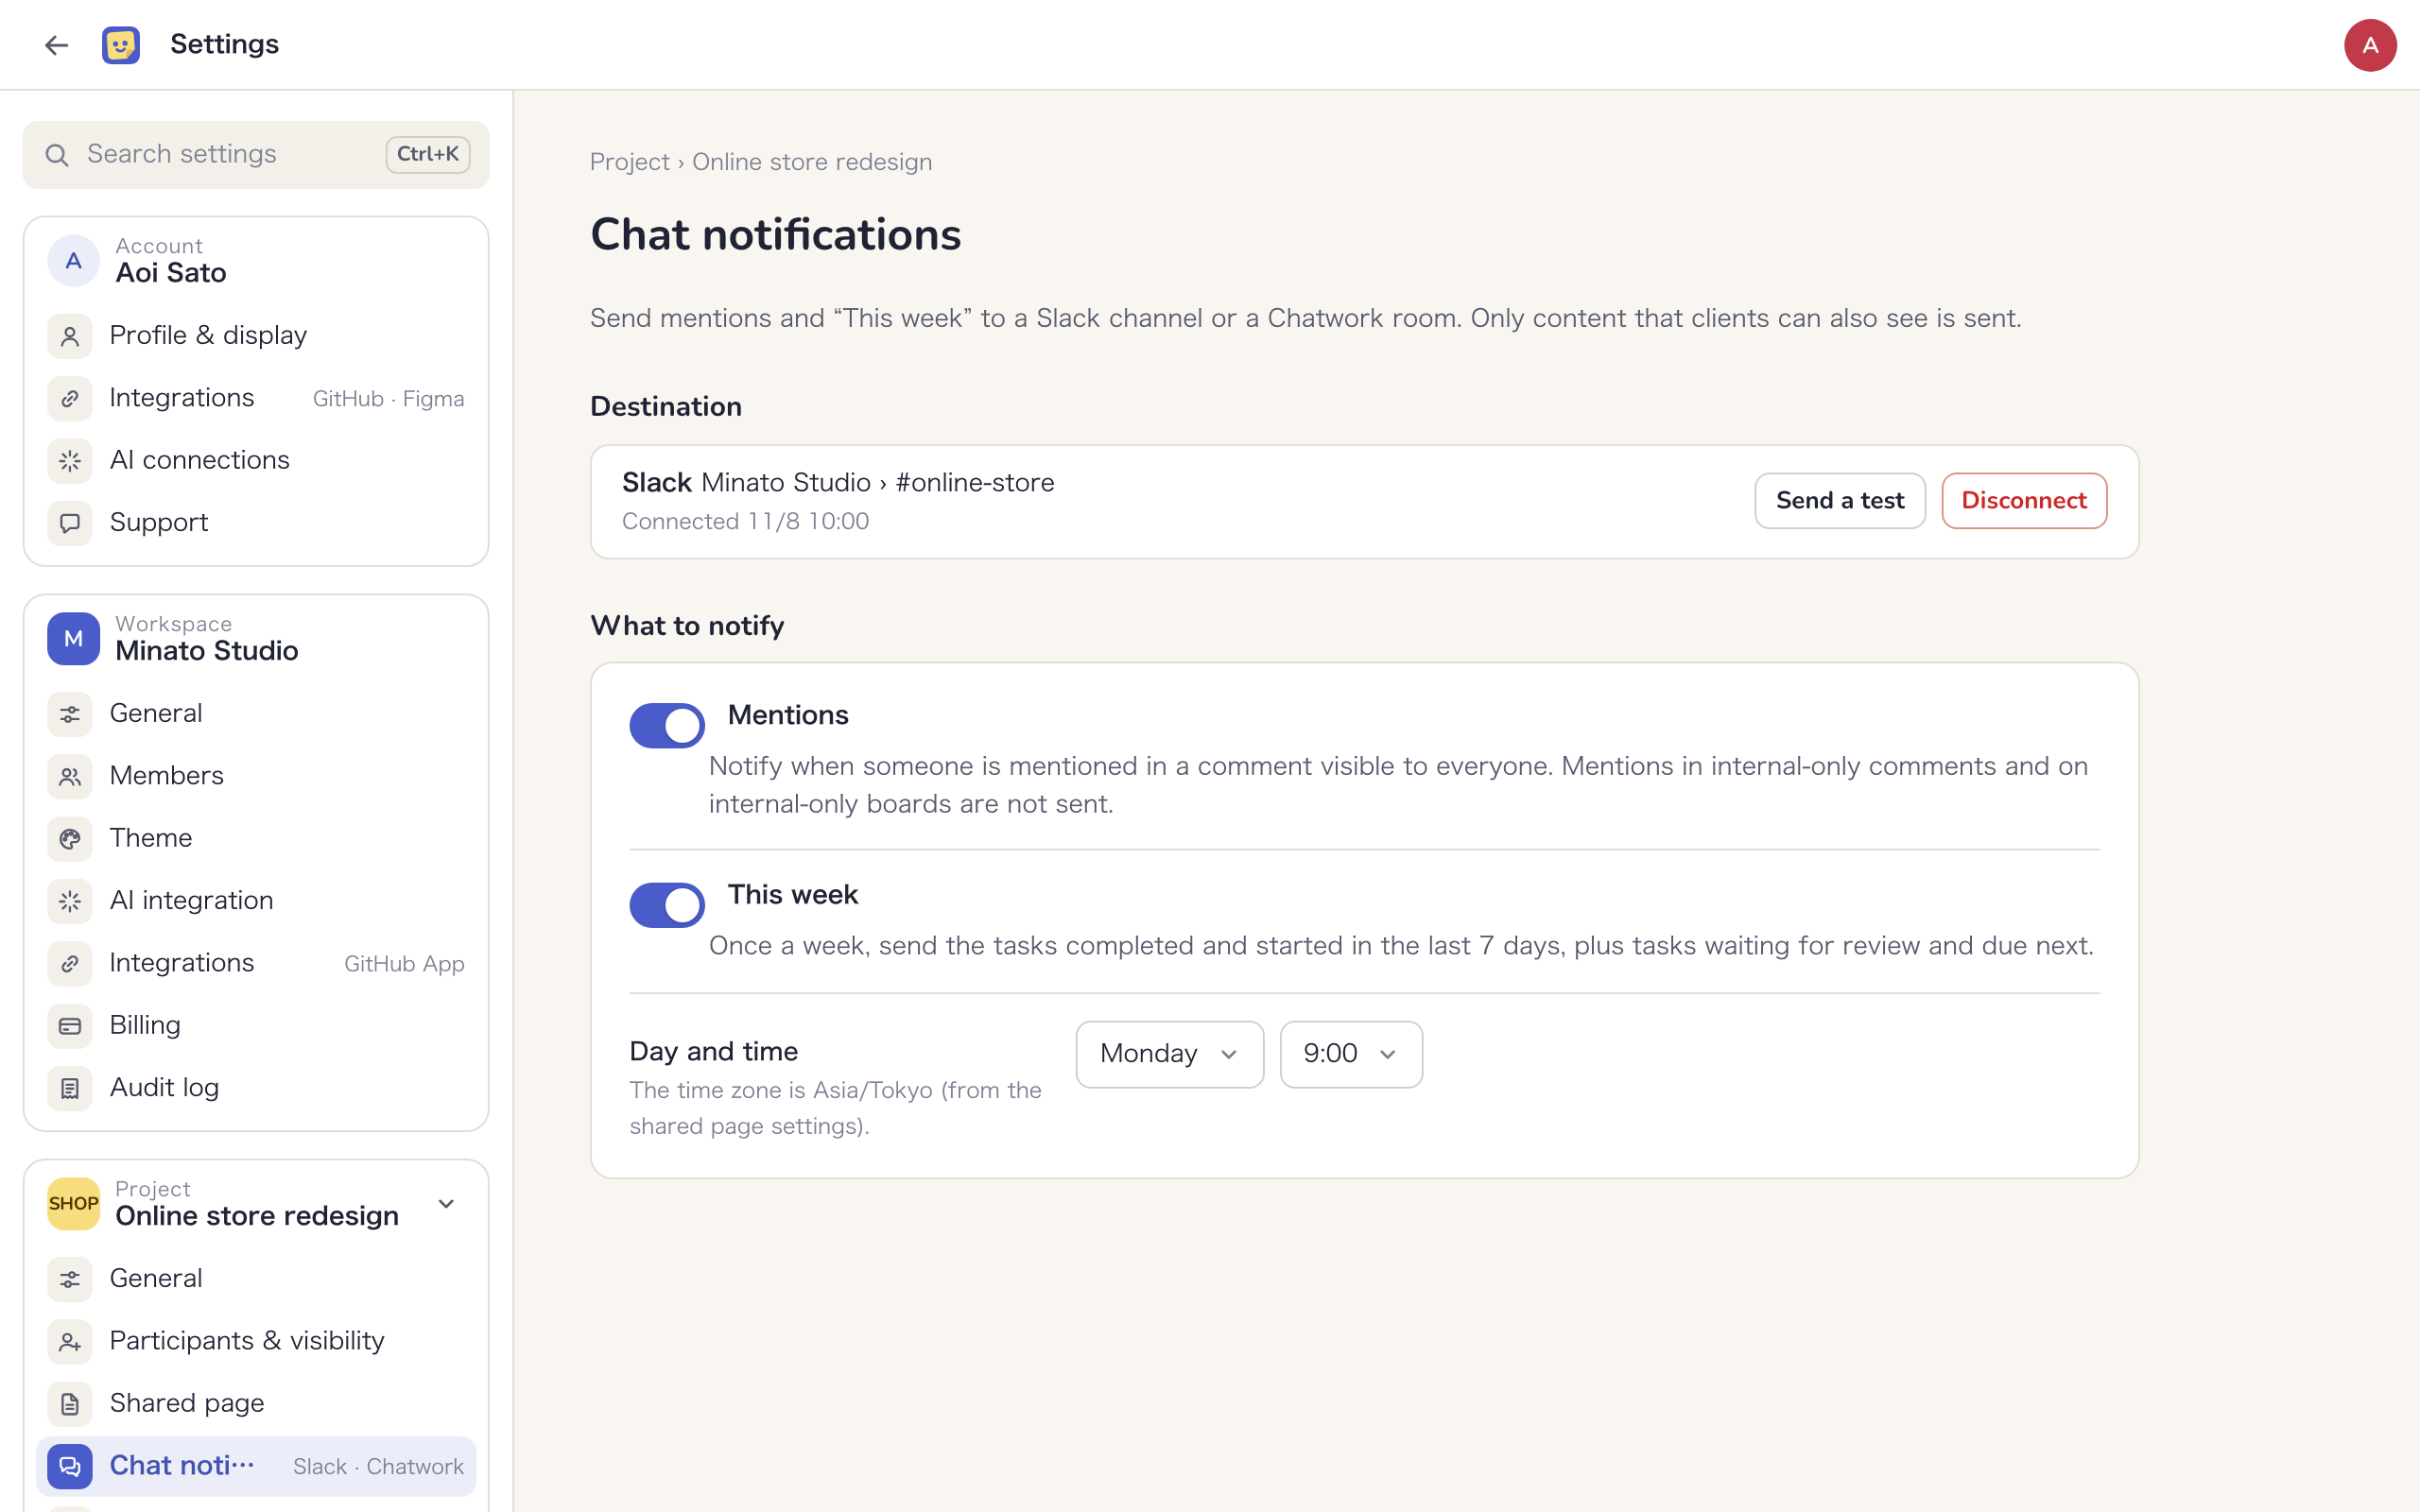
Send mentions and “This week” to a Slack channel or a Chatwork room. Only content that Clients can also see is sent. Only Managers can change this, and each project has one destination.
Connect a destination
- Slack: click “Connect Slack” and choose the channel on Slack’s screen. Once connected, a confirmation message is sent to the channel
- Chatwork: enter an “API token” and the “Room ID” (the number after “rid” at the end of the room’s URL), then click “Connect Chatwork”. Messages are posted as the account that owns the token, so we recommend a token from an account used only for notifications
After connecting, click “Send a test” to send a test message. “Disconnect” stops notifications, and you can connect again later.
What to notify
- “Mentions”: sends a notification when someone is mentioned in a comment visible to everyone. Mentions in internal-only comments and on internal-only boards are not sent
- “This week”: once a week, sends the tasks completed and started in the last 7 days, plus tasks waiting for review and due next. Choose the day and time under “Day and time”. The time zone comes from the shared page settings
Labels
Set up the labels used on tasks. Labels can be put on tasks on any board in this project and used to filter the timeline and the list. Managers and Members can create, change and delete labels.
- Type a “Name of the new label” in the field at the bottom and click “Create label”. You can have up to 50 labels
- Edit a name in the list to rename a label, and use the color selector to pick one of 12 colors. The list also shows how many tasks each label is on
- Click “Delete” and confirm to remove a label from every task
Label names are visible to everyone in the project, including Clients and external participants. Do not use words you cannot show outside your team. A deleted label cannot be restored.
Integrations
See the GitHub repositories linked to this project and the Figma files linked to screens. Only Managers can link repositories.
Repositories
- Choose a repository under “Choose a repository”. If it is missing, let the GitHub App read it under “Integrations” in workspace settings
- Click “Add repository”
Pushes, PRs and issues from linked repositories become activity of this project. They are linked to tasks as follows.
- Write a task key in a branch name, PR title or body, commit message or issue to link it to that task
- Pasting a PR or issue URL into a card’s links also links it
- Events that match neither become activity of the whole project
If you click “Unlink”, activity already collected stays.
The page also shows the steps for setting up a GitHub autolink. This is optional; once set up, keys in PRs and commits become links to Mockedule tasks. See Integrations for details.
Figma files
Figma files linked to screens are listed with their last update, version and the boards that use them. This list is view only; link files to screens from the side panel of a board.